A professional receipt is so much more than a simple slip of paper. Think of it as the final handshake after a sale—it’s a lasting impression of your business. Using free printable receipt templates is a simple way to level up your brand, build trust with customers, and make your own financial tracking a whole lot easier. It turns a basic document into a genuine business asset.
Why Professional Receipts Matter For Your Business
When you move past handwritten notes or generic records, a professional receipt reinforces your credibility and brand identity. The difference between a clean, branded document and a scribbled note is huge, and it directly shapes how customers see your business's reliability and attention to detail.

This isn't just about looking good; it has real financial benefits. In the small business world, every minute and every dollar counts. This is especially true when you consider a stark reality from SCORE: a staggering 82% of small businesses fail because of poor cash flow management. That number alone highlights just how crucial accurate financial tracking is, right from the very first transaction.
Strengthen Your Professional Image
A polished receipt immediately tells a customer you're competent and legitimate. When they get a well-organized document with your logo, business details, and a clear breakdown of charges, it sends a powerful message: you're a serious, trustworthy operation. That small touch builds confidence and can easily be the reason they come back.
I once worked with a freelance designer who was always chasing late payments. After they switched from simple email confirmations to standardized, professional receipts, their average payment time improved by nearly 40%. The official look and clear layout of the document simply encouraged clients to pay up faster.
Improve Financial Management
Good bookkeeping starts with accurate and consistent receipts. Creating them from scratch every time opens the door to errors, missing information, and hours of administrative headaches. A standardized template, on the other hand, ensures every crucial detail gets captured, every single time.
This consistency is a lifesaver for:
- Accurate Expense Tracking: You can easily monitor income and get ready for tax season without a last-minute scramble.
- Simplified Audits: If you ever need to show your financial records, having a clean, sequential set of receipts makes the process smooth and stress-free.
- Clear Dispute Resolution: A detailed receipt is undeniable proof of a transaction, protecting both you and the customer if a disagreement ever pops up.
Manually writing receipts or typing them into a basic document just can't compete with the efficiency and polish of a good template. The difference is night and day.
Manual Receipts Vs Template-Based Receipts
| Feature | Manual Receipts (Handwritten or Basic Doc) | Template-Based Receipts (Using a Generator) |
|---|---|---|
| Time & Effort | Time-consuming; requires manual data entry for every transaction. | Quick and efficient; auto-populates fields and performs calculations. |
| Accuracy | High risk of human error in calculations, dates, and item descriptions. | Automated calculations and standardized fields virtually eliminate errors. |
| Professionalism | Often looks inconsistent, unprofessional, and can lack key details. | Creates a clean, branded, and professional document every time. |
| Record-Keeping | Can be difficult to track and organize; physical copies get lost easily. | Easily saved, searched, and organized digitally for streamlined bookkeeping. |
Using a template is simply a smarter way to work. It saves you from tedious admin tasks and presents a much more credible image to your customers.
Ultimately, it’s not just about generating receipts. Knowing how to organize receipts effectively is key to managing expenses and preparing for tax time. Using free printable receipt templates sets your business up for greater efficiency and a stronger professional reputation, turning a daily necessity into a real strategic advantage.
Finding The Perfect Receipt Template For Your Industry
Picking the right receipt template isn't just about plugging in your logo and calling it a day. A generic receipt can cause more problems than it solves, leaving out critical details that can lead to confused clients, payment delays, and an unprofessional vibe. What a restaurant needs to document is a world away from what a vacation rental host has to track.
Think of your receipt as the final chapter in a transaction's story. A simple sales slip might be fine for a quick retail purchase, but for service-based businesses, it's a recipe for disaster. When the details are vague, clients get nervous, and that’s when payments get held up.
This is a huge headache for freelancers. In fact, a Freelancers Union report found that a shocking 74% of freelancers have trouble getting paid on time, often because their invoices or receipts are unclear. This is exactly why industry-specific templates are so crucial. Tools like ReceiptGen have over 15 designs built for everyone from moving companies to hardware stores, solving this problem before it starts.
Matching The Template To The Service
Let's get practical. Imagine you're a general contractor. A receipt with a single line for "services rendered" is useless. You need to break down the costs so the client knows exactly what they're paying for.
A proper contractor's receipt should have dedicated spots for:
- Labor Hours: A clear field for hours worked and the rate.
- Material Costs: An itemized list of lumber, paint, fixtures—everything.
- Permit Fees: A separate line for any municipal permits you had to pull.
Without these specific fields, you’re forcing your client to guess and turning your own records into a mess. A good contractor template makes the whole process transparent and builds trust right from the get-go.
Hospitality And Lodging Scenarios
The hospitality world is another perfect example. If you’re a Vrbo host, a standard retail receipt won't cut it. Your guests, especially those on business trips, need a detailed breakdown for their expense reports.
Your vacation rental receipt must clearly outline:
- Nightly Rate: The cost per night and the total number of nights.
- Cleaning Fees: The standard, one-time charge for tidying up.
- Local Occupancy Taxes: Legally required taxes need to be itemized.
- Security Deposit: A note showing the deposit was paid and its status (i.e., refunded).
Providing this level of detail instantly elevates your operation from a side hustle to a professional business in your guests' eyes.
When you can provide a detailed breakdown of charges, you move from being seen as a hobbyist to a professional business operator. It’s a small step in paperwork that makes a huge leap in brand trust and guest satisfaction.
Retail And Food Service Needs
Even in seemingly straightforward industries like retail or food service, the small details matter. Every restaurant receipt needs a dedicated line for a tip or gratuity. That’s non-negotiable. A clothing boutique, on the other hand, needs space to print its return policy and a field for a discount code.
The point is to find a template that already fits how you work. If you find yourself constantly adding handwritten notes or deleting irrelevant fields, you're wasting time and opening the door for mistakes. Taking a minute to find the right free printable receipt template for your specific industry will save you countless administrative headaches down the road. You can see how these details come together by looking at a well-structured sample business receipt.
How To Customize Your Printable Receipt Template
Once you've picked a solid starting point, it's time for the fun part: turning that generic file into a receipt that's unmistakably yours. Customization is more than just filling in blanks; it’s about injecting your brand’s personality and professionalism into every single transaction. And with a tool like ReceiptGen, you can create a polished, branded receipt in just a few minutes, no design degree required.
Before you even touch a text field, it helps to have a clear selection process. Think of it like a funnel.
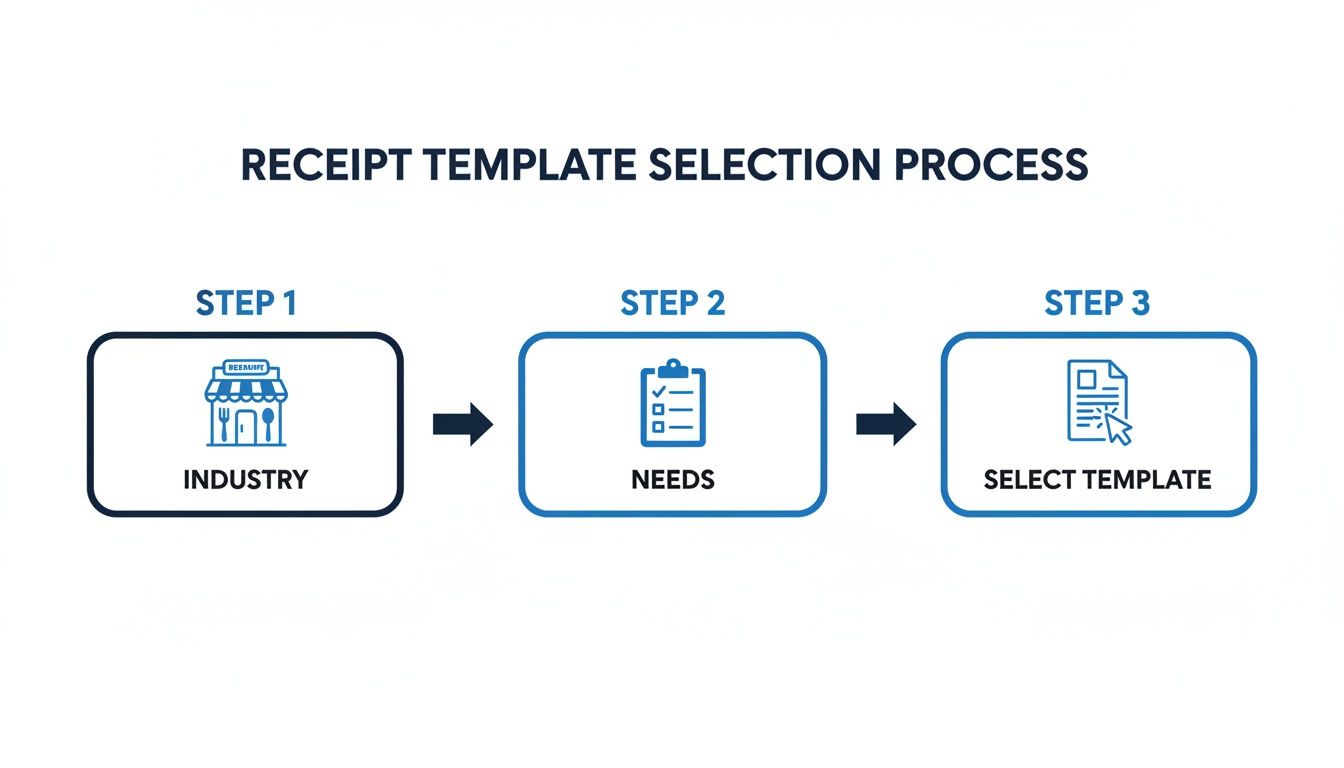
This simple flowchart shows how you can narrow down your options—first by industry, then by your specific needs—to land on the perfect template. Starting with a great fit makes the final tweaks much faster and more effective.
First Things First: Establish Your Brand Identity
Your logo is the handshake of your business; it needs to be the very first thing you add to your receipt. This one simple action instantly transforms a standard document into an official piece of brand communication. It builds recognition and gives customers the professional experience they expect.
Most modern receipt makers have a dead-simple upload function. In ReceiptGen, for example, you just click the logo area and pick your file. Always use a high-resolution version to avoid that dreaded pixelated or blurry look, whether it’s printed or viewed as a PDF.
Pro Tip: If you have different logo versions (like full color vs. black and white), think about how it will be printed. A clean, one-color logo often looks much sharper on a standard black-and-white printout from a thermal printer.
Next up, get your business details in there. This includes your:
- Business Name: Make sure it's your full, official business name.
- Address: Your physical store or main office location.
- Phone Number & Email: Give customers a clear and easy way to get in touch.
This info isn't just for show. It's a legal and tax requirement, so take a second to double-check that every detail is current and accurate.
Get Down to the Nitty-Gritty: Detail the Transaction
The heart of any receipt is the itemized list of what was actually sold. Clarity here is non-negotiable. I’ve seen it a hundred times—vague descriptions lead to confused customers and headaches down the road. The goal is to make the transaction totally understandable at a quick glance.
Start by adding a line item for each product or service. Please, no jargon. Instead of something cryptic like "Web Dev Svc," spell it out: "Website Development Services - 5 hours." Being specific builds trust and is a lifesaver for clients who need to submit expense reports. With a tool like ReceiptGen, adding or removing lines is a breeze, so you can tailor each receipt to the specific sale.
When you're plugging in prices, be meticulous. Enter the unit price and quantity for every item. The good news is that most receipt generators automatically calculate the subtotals, which dramatically cuts down on manual math errors. If you're a freelance consultant, for instance, your line item might be "Project Consultation" with the quantity set to the number of hours and the price as your hourly rate. For a deeper dive into structuring these documents, check out our guide on Excel receipt templates.
Finalize the Financials
With all the goods and services itemized, the last step is to nail down the taxes and total payment. This part has to be perfect. Many receipt tools will automatically calculate sales tax for you based on a percentage you enter—just be sure to verify your local tax rates to stay compliant. Applying the wrong tax rate is a surprisingly common mistake that can create a real mess in your books.
Next, note the payment method. Did the customer pay with cash, a credit card, or a digital wallet like Apple Pay? Recording this is crucial for both your records and theirs.
Finally, give the entire receipt one last look-over.
- Is your logo clear and placed correctly?
- Is all your business contact info accurate?
- Are all products and services described clearly?
- Are the prices, taxes, and final total 100% correct?
This quick final check is your safety net, ensuring you send out a flawless, professional document every single time. It's not just about looking good; it's a proven way to build credibility. The need for these simple tools is huge—eForms, for example, has seen over 59,397 downloads of its templates. By taking a few minutes to personalize a free printable receipt template, you’re creating a valuable asset that strengthens your brand and smooths out your operations.
The Anatomy of a Professional Receipt: What You Can't Afford to Miss
Once you've nailed down the look and feel of your template, it's time to focus on the content. A professional receipt is so much more than a simple acknowledgment of payment—it's a critical legal document. It protects you, it protects your customer, and getting it wrong can lead to headaches you just don't need, from payment disputes to serious tax compliance issues.

Think of these elements as the non-negotiable foundation of a trustworthy receipt. They provide the clarity that builds customer confidence and, believe me, makes your bookkeeping infinitely easier.
Your Business and Customer Information
This might sound basic, but it’s the very first thing an accountant or auditor looks for. Every single receipt must clearly show your full business name, address, and contact information (like a phone number or email). This instantly answers the "who got paid?" question and gives customers a direct line to you if they have any questions.
Just as crucial is the customer's information. Listing their full name and address is especially important for larger sales or ongoing services. It creates a direct, official link between the transaction and a specific client, which is priceless for your records and essential for theirs when it comes to expense reports.
A valid receipt needs specific data points to keep accountants and tax auditors happy. A simple "paid" scribbled on a piece of paper won't fly. For a document to be legitimate, it has to contain verifiable details about who paid, who was paid, and what exactly was exchanged.
Transaction-Specific Details You Cannot Skip
With the "who" established, you need to make the "what, when, and how" absolutely clear. These details are the heart of the transaction record, and they're what you'll rely on for accurate financial tracking or if a dispute ever comes up. If you miss any of these, the receipt could be considered invalid for official use.
Here are the critical details to include:
- A Unique Receipt Number: This is an organizer's dream. Using a sequential number (e.g., #001, #002, #003) creates a perfect audit trail, gets rid of duplicate entries, and makes finding a specific transaction a breeze.
- The Transaction Date: The exact date the payment was made is fundamental for everything from accounting and tax filing to handling warranty claims.
- An Itemized List of Products or Services: Vague descriptions like "services rendered" are a huge red flag. You need to clearly list each item or service, along with the quantity and the price for each one. That transparency leaves no room for confusion.
- The Payment Method: How did they pay? Cash, credit card, bank transfer? Noting the method helps you reconcile your bank statements and paints a complete picture of the transaction.
The Financial Breakdown
The last piece of the puzzle is a completely transparent breakdown of the costs. This section has to be mathematically perfect—no exceptions. A clean, accurate financial summary is non-negotiable for both your records and your customer’s trust.
Here's a quick checklist for the numbers:
- Subtotal: This is the total cost of everything before you add taxes or apply any discounts.
- Taxes: Show the exact amount of sales tax or VAT charged on its own line. This is a legal requirement in most places.
- Total Amount: The final, all-in amount the customer paid. Make this figure bold and easy to spot.
By making sure your free printable receipt templates include these key elements, they become genuinely powerful tools for managing your finances. For a more detailed walkthrough of putting all this together, you can learn how to make a receipt for payment in our complete guide. Trust me, these small details make a massive difference in how professionally your business is perceived.
Best Practices For Printing And Digital Delivery
You’ve designed the perfect receipt, customized with your logo and all the right details. That's a huge step, but now comes the final, crucial part: getting it into your customer’s hands.
Whether you're handing over a crisp physical copy or sending a clean digital file, that final delivery is a reflection of your business. A sloppy print job or a poorly formatted email can undo all the hard work you put into looking professional.
Choosing The Right Digital Format
The file format you choose really matters, and the right one depends entirely on how you plan to share the receipt. Think of it like picking the right tool for a job—you wouldn't use a hammer to turn a screw, and you shouldn't send a PNG when a PDF is the more professional choice.
For almost any business transaction, PDF (Portable Document Format) is the gold standard. When you email a receipt to a client, a PDF keeps its formatting perfectly, no matter what device or software they use. It looks sharp, professional, and—most importantly—it’s not easily altered, which protects the integrity of your transaction record.
PNG (Portable Network Graphics) files, on the other hand, are better suited for quick, informal sharing. If a customer just needs a fast visual confirmation of a payment through a messaging app, a PNG works just fine. But be aware, they can look less professional and are often much harder to print cleanly than a PDF.
The format you choose sends a subtle message. A clean, locked PDF says 'professional and secure.' A simple image file can sometimes feel like an afterthought. When in doubt, always default to PDF for formal business communications.
And here’s a non-negotiable step, no matter which format you use: always save a digital copy for your own records. Before you hit send or print, save that final receipt to a specific folder on your computer or in the cloud. Having an organized, searchable archive is an absolute lifesaver during tax season or if a customer dispute ever comes up.
Getting The Perfect Print Every Time
If you’re handing customers a physical receipt, the print quality is a direct reflection of your brand. A faded, misaligned, or cutoff receipt just looks sloppy. Taking a few seconds to double-check your printer settings can prevent these common issues.
Here’s a quick checklist to run through before you hit the print button:
- Always Check the Print Preview: This is your best friend. It shows you exactly how the document will look on paper, so you can easily spot any text that’s about to get chopped off by the margins.
- Select "Fit to Page" or "Scale to Fit": This little setting is a lifesaver. It automatically adjusts the receipt’s size to fit whatever paper you're using, which prevents awkward cropping.
- Use High-Quality Print Settings: It might use a little more ink, but selecting the "Best" or "High Quality" print option ensures your logo is crisp and all the text is sharp and easy to read.
- Verify the Paper Size: Make sure the paper size in your printer settings (like Letter or A4) actually matches the paper you have loaded in the tray. This mismatch is one of the most common causes of printing errors.
Troubleshooting Common Printing Problems
Even with careful prep, printing issues happen. If your receipt isn’t coming out right, don’t just hit print again and waste more paper.
First, check for low ink or toner levels—this is the number one cause of faded or streaky prints. If the text is blurry or has gaps, try running your printer's built-in nozzle check and head cleaning utility. If the alignment is off, use your printer’s calibration tool.
These simple maintenance steps can solve over 90% of common printing problems, ensuring your free printable receipt templates look sharp and professional every single time.
Common Questions About Receipt Templates
When you start using free printable receipt templates, you're bound to have a few questions. I see the same ones pop up all the time. Getting these sorted out from the beginning makes the whole process smoother, so you can create professional receipts without any hesitation. Let’s walk through the big ones.
Are Free Printable Receipts Legally Valid For Tax Purposes?
This is usually the first question on everyone's mind, and for good reason. The short answer? Yes, absolutely.
A receipt’s legal standing has nothing to do with fancy paper or a cash register. It’s all about the information it contains. As long as your printed receipt has all the critical details your local tax authority requires, it's a completely legitimate document for your records and theirs.
To stay on the right side of things, make sure every receipt includes:
- Your full business name and address
- The customer's name
- The date of the transaction
- A clear description of the goods or services
- The subtotal, any taxes, and the final amount paid
A good template from a tool like ReceiptGen will have dedicated spots for all of this, basically guiding you to fill in everything an accountant or tax auditor would look for.
Can I Add My Business Logo To A Free Receipt Template?
You can, and you definitely should. Adding your logo is probably the single fastest way to take a generic template and make it look like a custom, professional document. It instantly reinforces your brand and builds trust with your customers.
Modern receipt makers are designed with this in mind. It's usually a simple upload process—you just find the logo section on the template, select your image file, and you're done. It's a small step that makes a huge difference in how your business is perceived.
Remember, a branded receipt elevates your business from appearing like a hobby to operating as a professional entity. It’s a simple action that has a significant impact on customer perception and trust.
What Is The Best Format To Save My Receipt?
You might be working in a Word or Excel file to get things started, but when it's time to send the final receipt to your client, PDF is the way to go. There are a couple of solid reasons for this.
First off, PDFs are locked down and not easily changed. This protects the integrity of the document, so neither you nor your customer can accidentally tweak the transaction details later on. Second, a PDF looks the same no matter where it's opened—phone, tablet, or desktop. Most receipt generators give you an option to export directly to a clean PDF with just one click.
How Do I Keep My Receipt Numbers Organized?
Good organization is your best defense against bookkeeping headaches down the road. The most foolproof method I've found is a simple sequential numbering system.
Just start with a number like 001 and keep going in order (002, 003, etc.). This creates a clean, easy-to-follow paper trail for you and your accountant. Crucially, it prevents duplicate receipt numbers, which is essential for accurate financial tracking.
Some people even add the date into the number, like 2024-10-001, for extra clarity. You could track this in a spreadsheet, but tools like ReceiptGen often handle it automatically, assigning the next number in the sequence for you and taking the guesswork out of it.
Ready to create professional, customized receipts in seconds? With ReceiptGen, you can choose from over 15 industry-specific templates, add your logo, and export a perfect PDF every time. Start streamlining your paperwork today at https://receiptgen.com.